Showing posts with label MOCs. Show all posts

Thursday, January 31, 2013

A Classic Space Rover

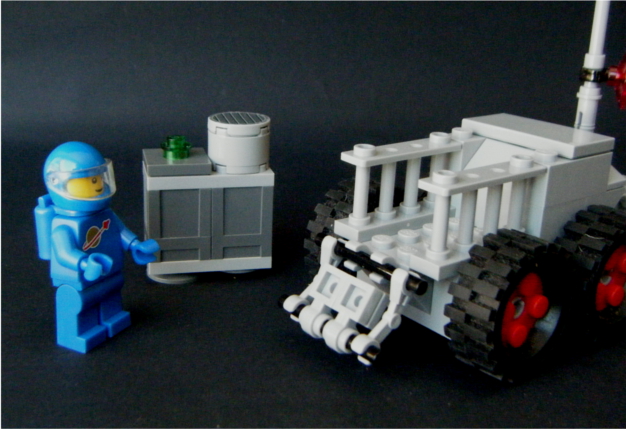
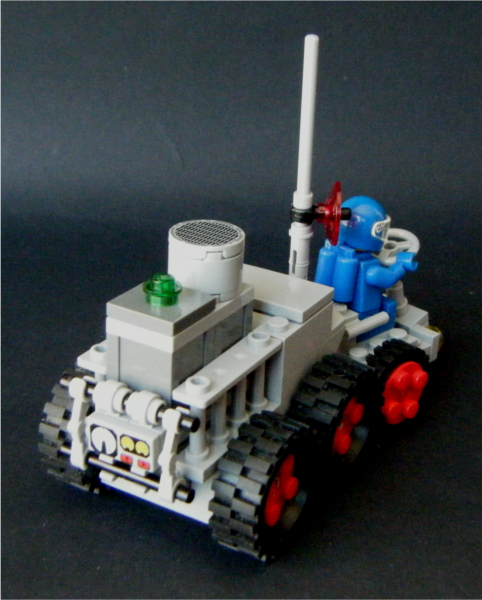
I don't build a lot of MOCs these days, but when I do, it seems that I build Space MOCs more than anything else. The first MOC of 2013 was no exception:


Made mostly of new light gray, this six-wheeled "Moon Rover" was inspired the fig driving it. He was the main reason I purchased 850423 Minifig Presentation Boxes while at the LEGO Store last--that and the fact that the set was on sale. Although Classic Space was well before my time, I am by no means immune to their charm and I have yet to come close to "having enough." I'd actually been thinking for some time about building a Space rover, partly because my bucket of wheels and tires was growing no smaller and partly because I'd been spending some time on Flickr's Classic Space Rovers set. The arrival of the little blue spaceman seemed like the perfect time.


The rover is not a particularly complicated build. It's a basic studs-right-side-up construction with no particular effort put into achieving studlessness. Mostly it was just an excuse to use a bunch of light bley pieces (a colour I have abundantly in small quantities...) and to give this spaceman a fun ride.


The crate or storage container in the back is lifted, still somewhat intact, from the safe that was Day 19's item in the 2011 City Advent Calendar.

Thursday, July 26, 2012

Space Police Patrol Ship

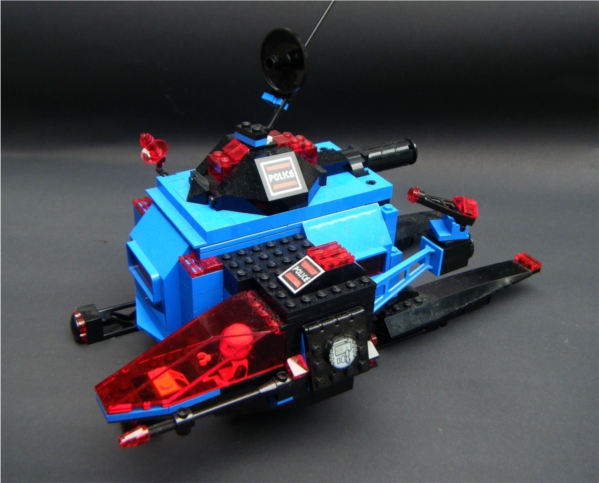
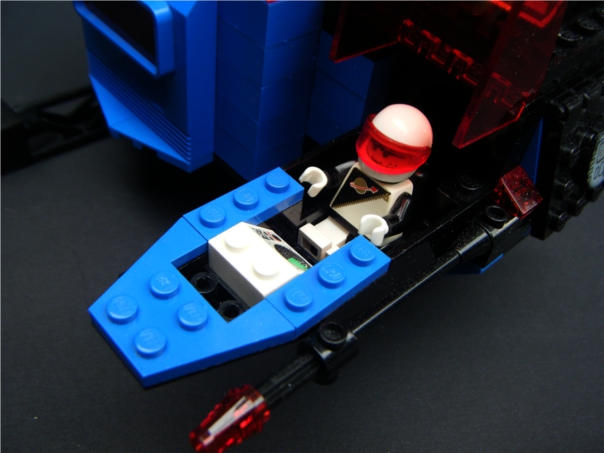
So far 2012 hasn't been a high-intensity year for MOCing. 2011 wasn't either, and things like wedding planning have made for understandable distractions; nonetheless, this year hasn't been completely without some from-scratch MOCing. The largest example of that was the Space Police patrol vessel that is the subject of this post.
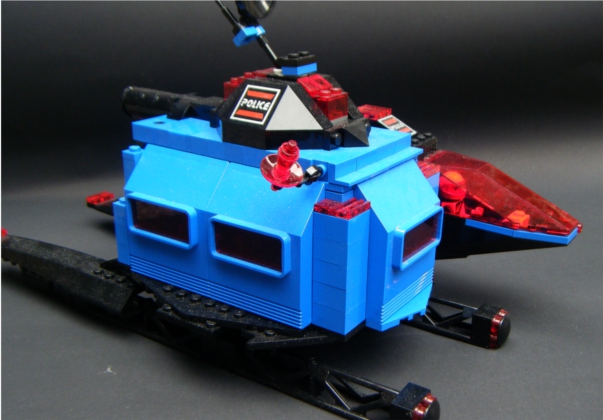
Although Space Police II (the 1992 sets) has always ranked high on my list of favourite LEGO themes, its predecessor from 1989 only ever existed on the fringes of my LEGO world--chiefly because I was barely acquainted with themes that old. Nonetheless, a Space Police (i) ship has been on my radar for some time. I picked up a few figs on Bricklink over the years, as well as a few basic "Space Police pieces" to use when the day came. The day came when I added to my collection of Panel 3x6x6 Sloped with Window pieces. I have four of these, in blue with dark trans-blue panes, from 6520 Mobile Outpost, an Arctic set. To this I added four of the same piece in red, from Bricklink, with trans-red panes, and then swapped the panes: red panes in blue panels, to use here, and blue panes in red panels for use in a Spyrius ship.
These large window pieces and the trans-red cockpit that had sat waiting in my collection for three years were the first elements of this ship. Then I started amassing blue and black "spacey" parts that I could use with them, and the basic shape started to come together. The triangular girders on their side ended up being pivotal to the shape of what came, as did the decision to put the cockpit windshield on the side, ala the Millennium Falcon.
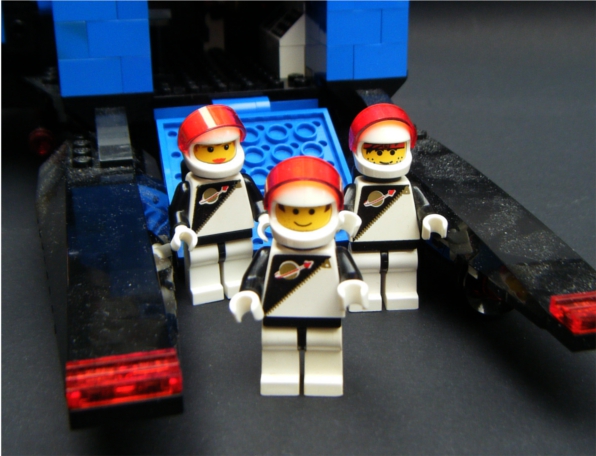
In addition to the parts that I had, the size of the ship was also determined by the crew: three of my four Space Police (i) figs are posted aboard--none of whom sport a classic "plain" head, a good sign that they were all acquired as parts rather than complete minifigures. As a general rule, I like the classic plain head... but I'm not always keen to outfit entire armies with it.
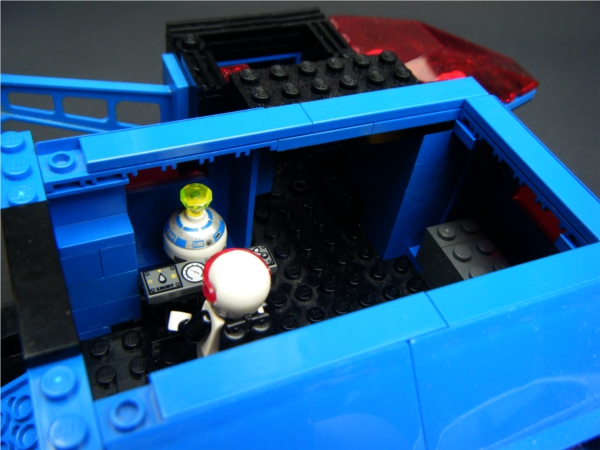
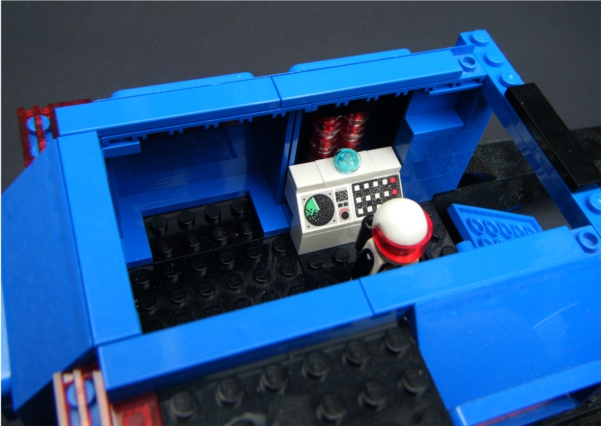
The interior shots don't show much of what's inside the ship, which is okay, because it's not particularly interesting. There are a couple of consoles, presumably monitoring the "power generator" and/or the "hyperdrive/warpcore/lightspeed-thingy" and a bed so that the crew can take turns sleeping. It doesn't have a jail cell, which might be counted a deficiency in a Space Police vessel...

Saturday, June 23, 2012

Wedding Favours

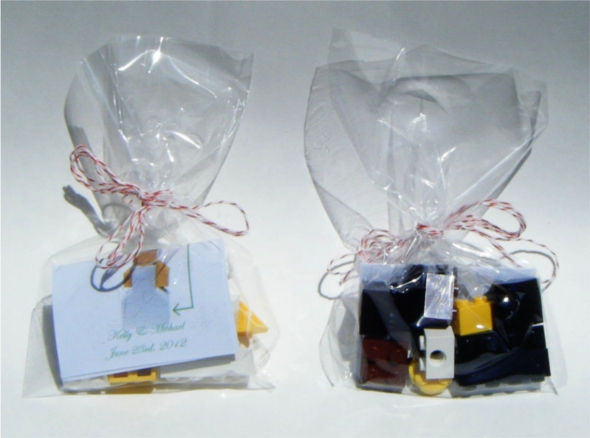
Although this post is being written long in advance of its publication date, when it *does* go live, it will be going live just as my wedding wraps up--appropriately so, because today's post is about the wedding favours I designed for our wedding. I wrote a couple weeks ago about the fact that I've designed a few custom LEGO sets for my brothers as Christmas presents over the last few years, and I put this talent to good use for our wedding. As a result, an element of LEGO (reflecting just a wee bit of my character and quite a bit of my new wife's Do-It-Yourself craftiness/artsiness) has been introduced into our wedding, and we have distinctive, hopefully somewhat unique, wedding favours that, despite that, were not terribly expensive for us. They're also, in my opinion, rather cute. The individual guest doesn't get the pair of them, I'm afraid. Instead, the grooms and brides will be dispersed singly. The set was fairly easy to design. I suppose, more than anything else, they owe their design to some of the Christmas sets I've seen over the years, as well as maybe a touch of the LEGOLAND theme park "Miniland scale" creations (though this is a bit smaller). The chief interest in designing them was to keep them simple: simple instructions would be easier to make, and simple parts would be easier to accrue in lots of 75. The finished project makes it one of the "cutest" polybags ever (cuteness would be my wife's touch much more than mine). We'll see how the guests like them later today.

Tuesday, June 12, 2012

Blacktron-painted X-Wing

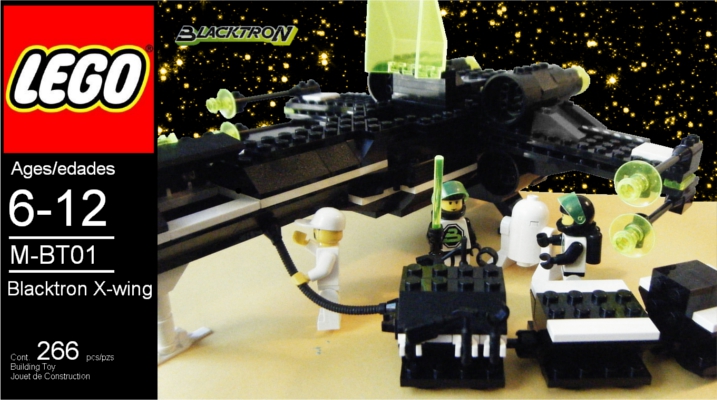
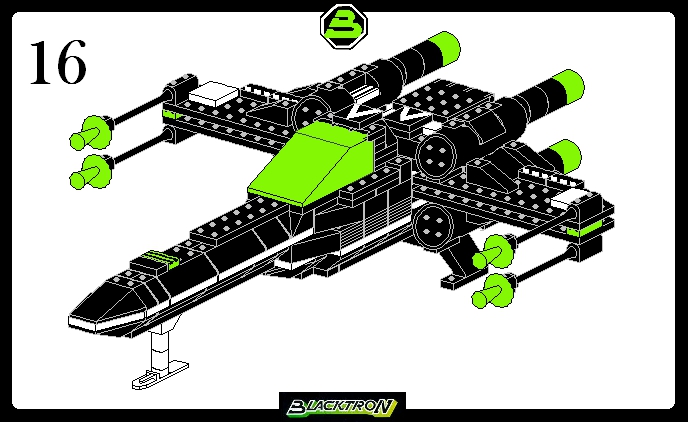
I've mentioned before that I like to "repaint" LEGO sets now and again. It's one of the simplest forms of MOC-making, and often it's a way to recapture the attraction of an old LEGO set in a new way. Normally, repainting is a rather simple task, but it can be taken to extreme lengths. A few years ago, as a Christmas present for my brother, I did just that: Some LEGO fans will recognise that this fake set is a repaint of one of the original Star Wars sets from 1999: 7140 X-wing Fighter. Although this original model has been superceded by shinier, curvier, more recent attempts, the original X-wing still has a certain "wow" factor. By the standards of the time it is well-designed, an excellent source of basic parts, and eminently--swooshably--playable. My younger brother did not own the set, though he is a Star Wars fan, and he is a major Blacktron fan (in particular a fan of Blacktron's second incarnation)--to the point of running a blog about Blacktron. In addition to having to find all the parts to make a Blacktron(ii)-coloured X-wing, I also had to make a couple minor adjustments for the canopy--and decide how I wanted to shift the minifigs from Rebel Alliance uniforms to Blacktron II. I ended up keeping the original minifig's faces but otherwise playing it straight with the Blacktron uniforms--though I went a bit further with the mechanic/ground crewman, who gets to wear a white version of his Star Wars counterpart. The astromech ("R2-unit") was similarly blanched: The REAL challenge to making this set, however, was not finding the parts (though that was my first real Bricklink-based parts-hunting venture), nor modifying the original LEGO set's designs, but putting together instructions. Fortunately, I'd tinkered around a lot as a teenager making MSPaint-based LEGO instructions, and still had the templates. Nonetheless, it was a time-consuming process--and made me wish I'd learned to use LDraw or a similar program. Below is a sample page of the instructions, to give an idea of the finished product: Though overly pixellated for some tastes, the end result is sharp enough--and was certainly something my brother could follow. Add in a fully-recovered box in the style of the first image, and you had one very happy younger brother that Christmas, as he received his first brand-new Blacktron (ii) set ever... and one rather exhausted older brother who decided not to tackle such a labour-intensive Christmas present again. He succeeded... mostly.

Sunday, February 5, 2012

Repainting

LEGO building, like most artistic endeavours, is a skill that one generally builds by imitating what other people have done, and for most LEGO fans the first master they study is the LEGO Company itself. Most MOCing techniques in a budding builder are based on what he's been taught to use in a LEGO set and when a builder steps out for the first time to build a MOC, the results are often close to official sets.

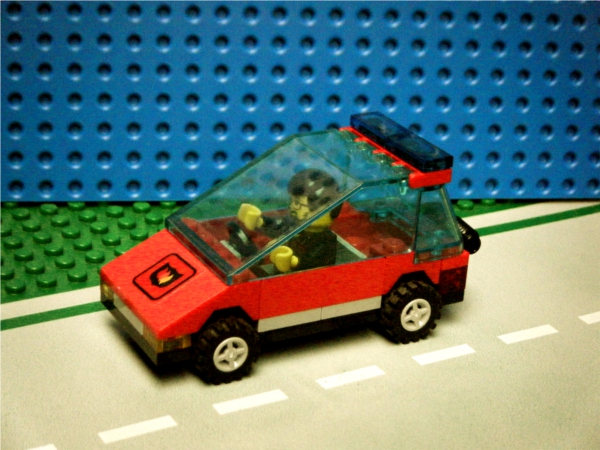
While I would like to think that I'm a bit beyond simple imitation of what goes on in official sets, I still do the occasional "paint job." I'm calling it that because the finished product is an official set, but painted with different-coloured pieces. This car is the most recent example:


Like a lot of paint jobs, this revisited car is a smaller vehicle. I tend to enjoy this scale because the smaller size makes it easier to find the pieces required in another colour to replicate the original. It's also a scale that LEGO does well. With most buildings they either have to skimp on parts or on size to keep the set's piece-count down to a manageable level, but this is not generally the case with vehicles.

The main reason for repainting this police car as a fire chief's car was the fact that I had the red 3x4 slope with wheel-wells and it even had the fire sticker on it, a relic from 6525 Blaze Commander, one of my earliest Town sets. I also had a spare 4x6x2 sloped cockpit. Between the desire to put both these parts to use and having more wheels and tires than I'll EVER use (true of most LEGO fans), this car fell together without much difficulty. It helps that it doesn't require any rare pieces.

Sunday, April 3, 2011

MOC: MX-2116 Spacefighter

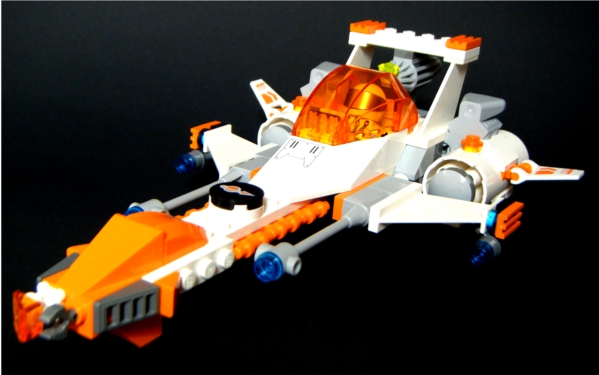
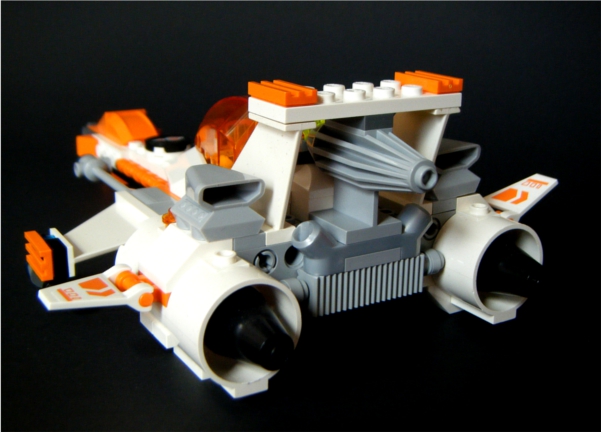
Following up yesterday's Mars Mission set is today's Mars Mission MOC. I only have the one, as it turns out, because I have yet to take apart any of my Mars Mission sets, except for my second copy of 7693 ETX Alien Strike. The pieces from this set form the core of this particular MOC, which I've christened with the imitative and unremarkable name of "MX-2116 Spacefighter."


Much like the M-Tron fighter MOC I previously displayed, the MX-2116 is fair basic build: studs up, and not particularly studless. In design, it's fairly reminiscent of a Battlestar Galactica Viper, and this was somewhat intentional.


In keeping with the established Mars Mission motifs, the MX-2116 features a white-and-orange colour scheme, with some trans-dark-blue highlights, and black/grey elements. I've probably used more grey than would have been found in a Mars Mission set, but I don't think the result is terribly incongruous. I also stuck to the idea that Mars Mission ships are powered by the trans-neon green crystals that the humans and aliens are fighting over in the series. (In my Space world, this is identified as the same element the Rockraiders were digging up, Brickonium--which was also a trans-neon green element.)


The best thing about the MX-2116, in my opinion--and the reason why it will probably stay together even after the Mars Mission sets get dismantled--is its swooshability. This all-important criteria of LEGO spaceships is more than adequately met, at least from my perspective.

Sunday, March 13, 2011

Minifigs: The Elf

When the Elf minifig was discovered to be included in the 3rd series of collectible minifigs, Castle LEGO fans rejoiced. It probably comes as no surprise, given my previous posts about The Lord of the Rings that I, too, was excited about the Elf's appearance. However, ever when I acquired him (as documented in this post), my inner Tolkien fan would not allow him to enter my collection unchanged. This post examines where his disparate parts ended up.

The problem with the Elf was his hairpiece. If I were to cast him as an Elf from Tolkien's canon, I would say from his possession of armour, long-bow, and colour-scheme that he is a probably a Sindarin Elf (Grey-elf), Nandorin Elf (Green-elf), or Sylvan Elf (Wood-elf). However, all those aforementioned Elves are members of the broader category of Telerin Elves... and as a general rule, Teleri have dark hair or silver hair. Golden hair is generally an indication of having Vanyarin blood... and the High Elves of the Vanyar never came back to Middle-earth and mingled with the Sindarin Elves et al (though some mixed Vanya-Noldorin Elves did bring back the golden-haired gene, and the King of the Elves of Mirkwood in The Hobbit is proof that gold hair is not exclusive to the Vanyar). In any case, movie-Legolas aside, my Elf wasn't likely to be permitted blond hair in my collection.

Besides, I subscribe to the "normal ears" party in the "what do Elven ears look like?" debate, and the Elf minifig has highly-prominent ears.

So what became of the Elf?


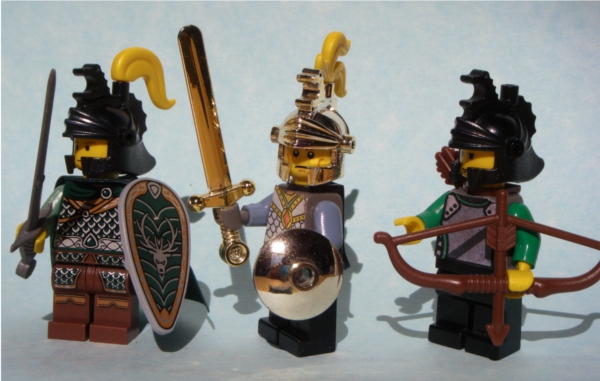
Well, if we consider a minifig's head to "be" the minifig (and the rest of the minifig to be his/her accoutrements), then my Elf became the warrior in the picture above. In so doing, he replaced a Han Solo lookalike as my golden-armoured Elf-prince. As you can see, he also acquired the steed from the Prince of Persia set I acquired the same time as the Elf.

Not that his armour went unused in my Elven army. Indeed, most of the Elf turned up as a part of my Elven fighting force.


This picture shows the three Elves who acquired pieces of "the Elf." You will recognise the already-portrayed Elf Prince, and notice that the armour and shield were inherited by the warrior with the Little Armory sword to his right, while his longbow (and Bricklink-bought quiver) arm the soldier to his left. One will note my prevalent preference for dragon-helms in equipping Elves.

Meanwhile, what happened to that blond-hairpiece-with-elf-ears, you ask? Did it end up in the minifig parts pile, never to be used with those extra top hats, blue caps, and Islander horns? Not so!


The hairpiece actually ended up on this custom version of the Brickster by chance. I wasn't intending him to be "finished" as such. I was actually planning on reconstructing him using his black tuque ("beanie" to non-Canadians), grey pants, and single blue glove. The spare Jayko pants and jestingly-grabbed elf-hair were mere placeholders, but I have become quite fond of the combination, and think that the elf-ears complement the impish facial expressions. How exactly a Puck of a Brickster ended up in my LEGO universe, I'm not sure yet... but he's definitely there.

Sunday, February 6, 2011

MOC: M-Tron Fighter

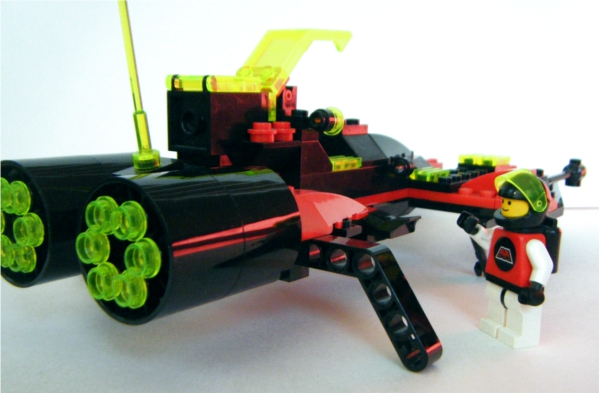
To anyone who's been following this blog, it's probably become clear by now that I tend in the direction of sets, rather than MOCs. Indeed, if you've been paying attention to my career on Classic-Castle, I've hardly ever posted a MOC online, and those I have are... not nearly as polished as most out there. I've been aware for quite a while now that I'm more of a fig-person than a building-person, and this is part of why I'm not a great builder. Practice is part of it too, and maybe I just don't have the native talent. Whatever the reason for it, I'm content with mostly being a set-person, rather than a MOC-person.

That doesn't mean, however, that I *never* build MOCs...


(Actually, it's probably worth noting that of my standing LEGO creations, half or more are probably MOCs... they just aren't necessarily that good.)

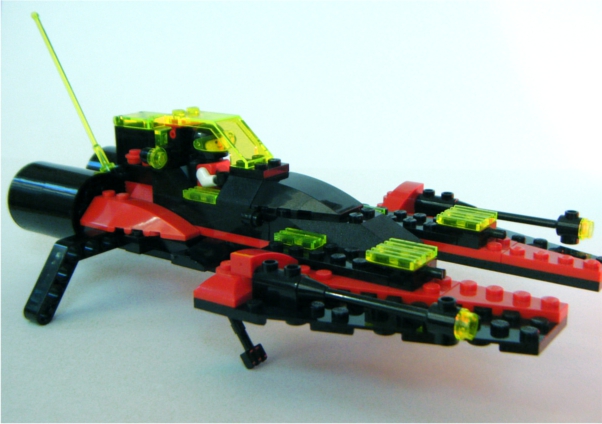
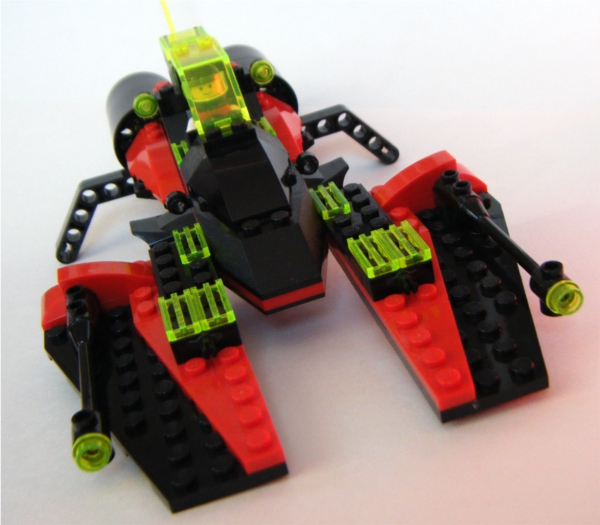
Anyway, this M-Tron fighter is one of my MOCs that I think is polished enough to make a public appearance. It's not that it's amazing... but I think it's okay. It is, in any case, swooshable, and that counts for a lot.


I've never had an M-Tron set. The two figs that I own were acquired via Bricklink, and it's pretty clear that I've not adhered strictly to things as they're modelled in the official sets. There is a lack of light grey, a total absence of magnets, and I'm not really sure that a fighter is an M-Tron appropriate vehicle.

The body of the fighter was originally an Extreme Team set, 2963 Extreme Racer, which I had rebuilt a couple years after the "great take-apart" of my sets, because I wanted the race car. You can still see a bit of the Extreme Team set's influence in the antenna and the cockpit, but it's rather hidden, I think.

All told, it's not a complicated build. It still has lots of studs showing, and is pretty much entirely a studs-up conservative build. The cockpit is classic LEGO in being completely unsealed. But it's fun, and I'm rather proud of it. Though I haven't got the pictures to show you, it still actually represents a significant development in my MOCing skills.